I never feel like I have enough space in my workshop. The promise of consolidating tools to make the most of limited space drew me to the Snapmaker Artisan, a plus-sized 3-in-1 tool combining 3D printer, laser engraver, and CNC machine.
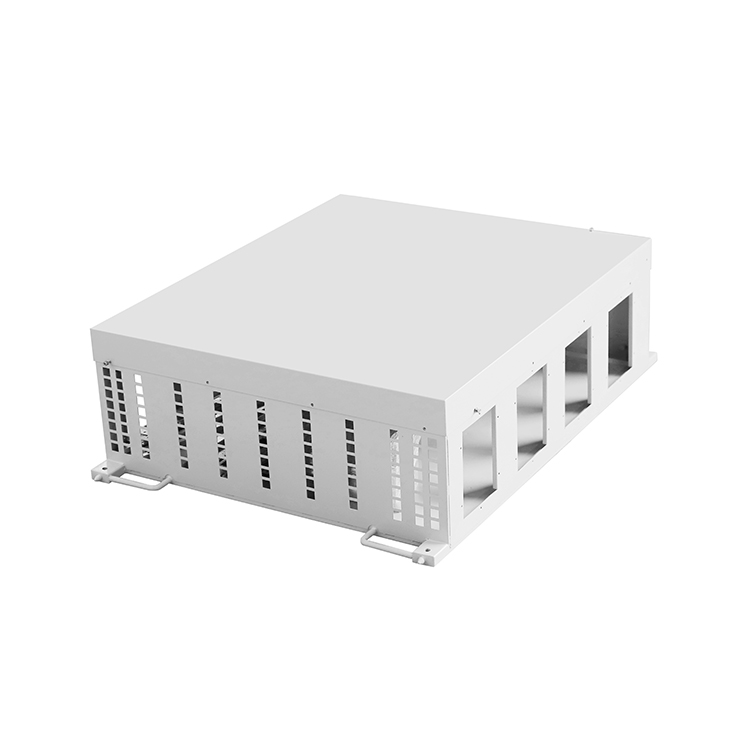
Jacks of all trades may be masters of none, but it is also true that a tool does not need to be a master of its functions to be useful. For many jobs, it enough to simply be serviceable. Does a machine like the Artisan offer something useful to a workshop? Bending Panel Manufacturer
Snapmaker was kind enough to send me an Artisan that I have by now spent a fair bit of time with. While I have come to expect the occasional glitch, having access to multiple functions is great for prototyping and desktop manufacturing.
This is especially true when it allows doing a job in-house where one previously had to outsource, or simply go without. This combo machine does have something to offer, as long as one can give it generous table space in return.
The Artisan is a large dual-extrusion 3D printer, CNC router, and diode-based laser engraver. To change functions, one physically swaps toolheads and beds. Very thankfully, there are quick-change fixtures for this.
Driving the Artisan is Snapmaker’s software Luban (GitHub respository). Named for the ancient Chinese master craftsman, it is responsible for job setup and control. For laser and CNC work, there are convenient built-in profiles for a variety of paper, plastic, leather, and wood products.
The unit is enclosed, nicely designed, and — while I have come to expect the occasional glitch — serviceable at all three of its functions. The size and stature of the machine warrants some special mention, however.
As far as desktop machines go, the Artisan is bigger than most. Ideally, it wants nearly a square meter of table space. That’s big, but compared to the space required for three separate machines, one square meter doesn’t look so bad.
Most tables and workbenches are only about 70 cm to 90 cm deep (28 to 36 inches), which is a bit shy of the Artisan’s footprint.
One option is to build a custom table. Personally, I connected two sturdy flat-top utility carts together with some 3D-printed adapters. This also provided storage underneath for the toolheads and beds.
The touchscreen control box (which normally sits alongside the enclosure) can be relocated. Doing so reduces the width needed to as low as 70 cm, allowing the Artisan to fit sideways on most standard tables and workbenches. Not ideal, but workable in a pinch.
The rear of the Artisan houses the exhaust port and ventilation fan. There is also a cable bundle that goes to the control box. The enclosure’s back panel can be removed, making the rear of the machine a bit easier to access for cleaning and servicing.
We’ll talk about ventilation later, but wherever you plan to put this machine, be aware there will be some need to access the back during assembly, and possibly also when cleaning up after a particularly dusty CNC operation. The enclosure, by the way, does a fantastic job of keeping CNC waste bits on the inside.
Be also aware that the rear of the machine is not 100% sealed. When laser engraving, laser light can escape from an uncovered ventilation port, or from gaps in the cable fixture. This should be taken into consideration when planning location.
I will say that the mechanical design, packaging, and assembly documentation of the Artisan impressed me. Parts were secure, directions were IKEA-level clear, and it was honestly kind of a joy to put together.
The Artisan uses sturdy linear modules designed to keep dust and debris away from inner workings by sealing them with thin metal sheets. Take care not to press on these areas during assembly. There’s a warning to that effect, but the linear modules are quite heavy. It’s easy to put a fingertip where it shouldn’t be when handling them.
Snapmaker has made combo machines before, but the Artisan has a number of advantages over its predecessors:
Snapmaker’s previous combo machines had a large number of individual screws involved when changing beds and toolheads, so quick-change hardware is a very welcome feature.
Besides all the usual operations that a CNC router, 3D printer, and diode laser can do, here are a few capabilities I think are worth mentioning:
This feature (as well as huge print volume) sets this machine’s 3D printing somewhat apart from others. It’s true that dual extrusion heads are often more trouble than they are worth, but Snapmaker’s auto-leveling dual toolhead has a clever XY offset calibration method to ensure extrusions line up properly. This makes two-color printing — or printing with special support material — much faster than if one were relying on filament swaps through a single nozzle.
This functionality comes at a cost: the 3D printing toolhead is proprietary, expensive, and heavy. It’s capable, but don’t expect to break any print speed records.
I was able to mill out a small Manhattan-style test board very cleanly and easily. It is a convenient alternative to etching a board and requires very little post-processing.
The 10W diode laser can cut and engrave various materials, and it turns out can also mark stainless steel. Despite the wavelength of laser not really being the correct tool for the job, I was still able to mark some steel flasks.
This process doesn’t handle curvature well (the laser loses focus and causes inconsistent results) and the heat over time buckled the thin steel. Other than that, a little wipe with oil afterwards looked promising!
The laser is capable of very fine control, and cutting intricate patterns into paper is something it excels at. As an experiment, I created a light box with a laser-cut shadow mask. Cutting a mask like this by laser is much faster and more accurate than doing it by hand.
I created this as one of the projects for which I used the 3-in-1 machine as much as possible to get a feel for it’s capabilities.
I generated the image (“Kitten in a workshop sunbeam”) with the help of Midjourney. The lighting mask was done with a combination of GIMP and Inkscape. I designed the enclosure to snap onto the back of a cheap IKEA 5×7 photo frame, and printed it on the Artisan.
Cutting paper creates smoke, so be sure to have ventilation set up. Also, keep laser power as low as possible to do the job. Otherwise, stray scraps of paper get scorched by the laser which causes extra smoke.
It’s pretty gratifying to use a single machine to perform multiple functions.
On the back of the enclosure is a ventilation port with a small fan. When 3D printing it can be advantageous to turn this fan on to ventilate the enclosure, depending on the material.
When using the laser module, one will definitely want to attach the vent hose to send smoke and fumes elsewhere. Laser cutting and engraving can create nasty smells and smoke, and some operations and materials are worse than others. Engraving is not too bad, but cutting wood or plastics is the worst. If both you and the machine are indoors, the little exhaust fan won’t cut it. The best way to deal with this is by adding a strong inline fan, and vent it all outside.
When CNC cutting, a handheld cordless vacuum makes cleanup much easier, and being able to access the back of the machine by removing the rear panel helps reach tricky areas.
As useful as the Artisan’s functions can be, and as convenient as it is to have them combined in a single unit, it’s important to know what it cannot do, and what it will not replace.
The Artisan is really three separate tools. Being a 3-in-1 doesn’t make mixing and matching functions any easier or more practical. One cannot easily 3D print an object then laser-engrave a serial number, nor easily print an object then CNC bore out a precise hole. But you can do these functions separately, just as though you were using three separate tools.
I had hoped this machine might be able to take the place of my (much larger and heavier) CO2 laser cutter, but that’s not to be. Diode lasers and CO2 lasers have different wavelengths. Their energy is absorbed differently by different materials, which means they do different jobs. Both will cut paper and engrave wood, but acrylic (for example) is a different story. A CO2 laser will beautifully slice clear acrylic, but a diode laser’s beam will pass right through it.
Air assist is a laser beam accompanied by a jet of compressed air that helps blow debris away, and control potential flare-ups. Air assist is most useful during cutting operations. If one is primarily doing light engraving, or working with lightweight objects that an air jet would blow around, lack of air assist is not a concern.
The first time I CNC cut MDF was also the last time the inside of the machine was 100% clean. At least the enclosure does a good job of keeping it contained.
There are a few things the operator is expected to know. The machine should be shut down before toolheads and beds are changed, as they are not hot-swappable. Re-calibrating toolheads is occasionally called for to address glitches. All this and more is the operator’s responsibility.
As a safety measure, opening the enclosure door during operation causes laser or CNC operations to stop. But when testing this function, I found that it takes a good moment to kick in. Be aware that the door sensor does not react instantly.
I don’t think Luban will ever be anyone’s favorite software. It does things its own way, and I have run into some glitches while experimenting. But once I witness a job starting properly, I can relax. Most issues are solved by re-calibrating a toolhead.
All that being said, as long as one can provide enough table space and ventilation (if needed), the Artisan provides an efficient way to combine three tools into one enclosure.
The Artisan might be big, but it’s smaller than three separate devices and it does a serviceable job of its functions. The full enclosure and the quick-change fixtures are extremely welcome features. The software makes job planning reasonably straightforward, but experienced users may find themselves longing for favorites like LightBurn, PrusaSlicer, Cura, or others.
Would a 3-in-1 tool like the Artisan be of use in your own workshop? If not, why not? Let us know in the comments!
The quality and potency of diode lasers now really is fun, and it seems like this isn’t a bad platform to expand on either. Though I would have liked to see some better shots of the frame structure and a deflection test – not going to expect it to be a great CNC mill being a multitool but is it really capable of removing stock at an at all practical rate? Does the tool changer have the stiffness against even light cutting loads in all directions? Or is it really more of a 2 useful tools and that weird almost useless extra you practically won’t ever use on the multitool?
And then the biggest one is it full of proprietary BS that makes it actively harder to use a different print head, cnc spindle, laser diode (perhaps to get one in the wavelength that works best for the material you want)? If you have to gut the electronics to make it play nice you might as well have built a machine from scratch yourself.
Either way pretty sure this isn’t the machine for me, not the right footprint, though I do think it looks interesting enough that while my workshop is in flux anyway maybe I can find it can find a space…
In my experience, a decent CNC for wood (stiffness) makes a bad 3D printer for speed, and even worse for laser, where you really need speed even more. Frame mostly looks like light CNC mill with the other functions tagged on. But their promo pictures are mostly about the 3D printing capabilities, so it might just not be very stiff.
And for that price, you can get a light CNC router, a vinyl cutter and 3D printer separately, have money to spare (potentially for a better laser cutter?), and be way less proprietary.
The two glaring safety issues (laser not properly enclosed, software controlled interlock) doesn’t strike confidence. And their proprietary hotend design looks awfully lot like the Ultimaker 3 hotend design.
The CNC cutting volume of 400×400 is one of those odd things I noticed on a lot of CNC routers. Wood material does not come in 400mm. It comes in 2440mm and halves of that. So 1220mm, 610mm, 305mm. So useful dimensions are slightly above those values. So, 400mm only fits the smallest of that size. I actually build my own machine at 1300mm x 350mm (cut area), which serves a large range of projects.
Yeah I’m looking at building my own to fit my space as well as possible. Currently leaning towards a larger gantry frame of less than ideal geometry (as it will be easier to use that way, even if it means a less stiff or heavier construction) with relatively small Z – which even in 3d printing mode shouldn’t impose much limitation, as really needing large in x-y AND z at once for a 3d print says you got the design wrong or shouldn’t be 3d printing it at all, and I’ll still have a more normal small cube/cylinder printer probably.
Though there isn’t any real reason a stiff CNC platform can’t be run fast – just need good bearings (which is why most CNC mills won’t run that fast as such good bearings for friction and stiffness are not cheap) and more power to accelerate the probably greater mass (though with the right materials you can easily get way stiffer than the 2020 extrusion style printer frames while also getting lighter if you wanted to).
> as really needing large in x-y AND z at once for a 3d print says you got the design wrong or shouldn’t be 3d printing it at all
Of course you know best what your needs will be. I agree that I don’t generally need all of a large x-y and z all at once, but I do find it helpful to have a fairly large z (that is, close to my x and y), since sometimes the way that I need to make the part work with 3D printing anisotropy is to print it tall.
> Either way pretty sure this isn’t the machine for me, not the right footprint
As with all of Snapmaker’s combined products, I see a pretty narrow use case. Given the tradeoffs they make, I don’t think they’re very useful.
I wonder what the DIY BOM price would be for this.
You can divide by 3 to get an idea.
i have a CNC router and a 3d printer. i can’t imagine trying to print on the same machine that i do milling with. the mess from milling would probably make the 3d printer ineffective fairly fast. a 3d printer can be inside your house. i wouldn’t recommend having a cnc router/mill anywhere but in a workshop because they make an immense amount of chips that get everywhere.
When I saw all the dust from milling, I was worried about contaminating the 3D printing part of things, but it seems to not really be an issue. The filaments sit outside the enclosure and feed in via sealed PTFE tubes. The toolhead and print bed are swapped in (and therefore “clean”). The dust left behind after cleaning really doesn’t get anywhere it shouldn’t thanks to sealed filament paths and swapped in bed and print head.
Great if the space is limited and swapping tool heads isn’t an issue. The disadvantage of a CNC doing 3D printing is that it’s a relatively heavy machine if it has any rigidity at all. Prints will be slow. For the laser it’s not an issue since the lower wattages don’t really allow for rapid movements anyway. I’d like my CNC to be much larger and more rigid, but a 3D printer doesn’t need to be larger than 300mm cubed for my purposes (any larger and print times are calculated in weeks rather than hours and using CNC becomes more practical anyway if the project doesn’t need 3D printing specific unique abilities).
The 3D printing is indeed slow compared to other printers. But on the bright side, at least it’s pretty quiet.
You artfully forgot to mention the cost, Donnie. This is a $3k machine. That there’s rich people playtoys on my side o’ the tracks. I can’t even afford those $600 gray-market CNC machines you import from China… probably just as well, as from what I hear, getting a machine that’s actually /useful/ roughly doubles the price.
This sort of thing has really irked me for a while.
In fact, Hackaday, I have a challenge for you. I want to see the next year of contests, at least, include two categories for special bonus rewards.
One, projects that include only commonly-available parts and components, and have no machine-made custom or proprietary parts within them. Entries would contain only parts and components available at local shops and stores, found curb/kerb-side or by dumpster diving etc, or from secondhand/thrift outfits, with an emphasis on lower-cost items and avoiding online purchases. It’s kosher to have to pull something apart or modify it in some way (for instance, using the YX8018 PWM chip from a $1.25 solar garden light as part of a homebrew power supply), but you CANNOT use parts that are 3D-printed, CNC- or manually-milled, plasma-cut, laser-cut, etc, unless you bought them on the open market, premade and NOT a custom order (eg Ponoko’s lasercutting service is not allowed, but a 3D-printed fan grill that some eBay guy designed and is hawking for $whatever is fine).
Two, projects that go even further, and additionally avoid any and all power tools beyond a dirt cheap cordless power drill. Before you balk — I can build you a cyberdeck in a weekend under exactly those conditions, just bring me a compact motherboard (like a thin client board or something weird and industrial, but no laptop mobos plz, I’m not reverse-engineering pinouts for you… also, nothing ARM, I’m not friggin ODROID lol) and an eDP laptop LCD panel and I’ll do you up right good. I have a hacksaw, a single file, and a fairly common set of nips and pliers and whatnot… my power tools are a 6v drill cobbled together from something NiCd, Craftsman, Nineties, and monstrous, a lantern battery, and the switch from a Black&Decker VersaPak electric screwdriver, and a “Hyper Tough” brand cordless drill that thinks it’s sooo awesome because it’s 12v and “Lithium”. I’m a friggin moron, but I’m stubborn. If I can do it, you can do it.
Those are some very specific requirements. Sounds like you want to crowdsource a project that only you will appreciate.
LOLno. Those are the exact conditions under which I build stuff. They’re not even all that specific. I just don’t have access to fancy pretty toys like you.
Really the “domestic ordering only” was just to simplify things. The rest was me being tired of 3D printed CNC’d to heck everything wirh a RasPi in the middle.
I can understand how annoying it is to not have the money to easily just get a useful tool… But with how trivial and cheap getting a working 3d printer is and doing a print is that seems an odd requirement – with so many old and perhaps half broken ones to pick up almost free from the folks that have upgraded to something that prints faster… But to me even more odd is picking on plasma/laser cut parts – you can create the exact same part entirely with handtools trivially enough, it just takes you longer (potentially much longer for some materials and levels of precision). But if your project isn’t worth that much time investment and you have no better way of making it available then it probably shouldn’t exist anyway…
And if you can’t take inspiration from something that used a part that is product of more complex processes and find a way to build that part or create an alternative with what you do have then again you presumably don’t care enough to actually make the effort or lack the ingenuity to find a way to make it with the stuff you do have. Look at the incredible amount of work put in creating fixtures and jigs to let you create a part on any of the more progress and methodology documenting makers.
Define “cheap”. I live on a bit more than $1200/mo. The 3D printers I can afford, even broken, are so restricted in capability as to basically be oversize desk toys. Think something like an original Monoprice Mini Delta, if it’s broken… I found out the hard way it’s not even worth the bother to fix.
Thing is, I don’t actually need any of that stuff. In fact, that’s the point everyone is missing here. All you get from a CNC or a 3D printer is pushbutton convenience and having exactly what’s in your mind come our the slot when you wait long enough. In my experience, getting together a huge pile of cr*p and saying, hey, what can I build with all this? produces some stuff that ends up being even more creative by half. In fact, that’s how almost all my cyberdecks get built, and I’ve got some pretty neat stuff in the works there.
And spares/repairs type and old printer bits to make up a new printer are often available it seems for the cost of collection and a pint… You then have to put time in to Frankenstein the collection of bits into a working printer, but that can be fun too.
Even the tiny printers are able to be very useful – really once you can print inside a 5cm cube you have more than you need to get good results with them – you just need to learn how to leverage what they are good at, how to create parts that register with each other and if you don’t want to print lots and lots of parts how to use the 3d printer for only the complex geometry while attaching it to some other simple substrate for the bulk. Obviously a bigger printer can be quicker and easier to make bigger bits with, but the magic of 3d printing isn’t the scale as you can always assemble more parts it is the comparatively complex to make any other way geometry it can repeatably churn out and the iterations you can easily make when a design needs revisions.
That’s great if you can USE them. My mind does not 3D model. I’ve tried. Suffice to say I’ve mucked around with the trial versions of many professional such applications as well as F|OSS stuff and back again, and anything more advanced than LibreCAD (which is very much 2D) is too much for me. I feel confident enough that I went through enough different programs with different user interfaces, for long enough, that it’s not a matter of which tutorial set to watch or who explains what best, it’s that I just can’t brain that way.
Honestly, everything I’d ever want to do could be handled by a manual mill with tolerances bordering on fractional inches. I rarely need anything more than plastic or aluminum sheet — steel, once in a while, but /only/ once in a while.
As I kind of hinted, I have a Monoprice Mini Delta v1. It needs a thermocouple. It also needs the hotend reattached and its power wires high temp buttspliced back together, because the fellow who discarded it on me was so startled by what modern high-temp wiring looks like that he ripped them apart and pulled the hotend off in the process. Apparently there’s also the need for it to have special feet printed (which I have somewhere) because otherwise it’s not quite level, and there’s some sort of known issue with the bed heater just kind of turning off at random for which it needs whatever the fix is for that.
It hasn’t left the box I got it in in over a year now because I have so little use for it I can’t be bothered even investigating what it would cost to fully fix it and get it properly going again.
I have needlenose and regular pliers. I have channel-locks and a mini vice-grip. I have screwdrivers and bit-driver sets. I have ONE file and a wad of sandpaper somewhere. I’ve got a hacksaw, a couple nice sets of drill bits, and two cordless drills, one of which (the one I jerry-rigged together out of the remains of a 90s Craftsman NiCd monstrosity, a lantern battery, and the switch mechanism from a B&D VersaPak electric screwdriver) spins at JUST the right RPM range so that if I stick a Dremel cutting-disc on it, it will slice through most plastics without making a disgusting mess by re-melting it. I have a secondhand Hakko 936 soldering station and literally Amazon’s cheapest hot-air pencil (it’s a “Sunsour” brand — honestly, I’ve no complaints). I also have multiple closets full of computer bits and bobs and just general junk and scraps.
A manual mill would be nice, something self-contained in its own tidy end-table-sized thing with maaaybe a 2ft by 3ft work surface or so, but other than that… I’m all good, thanks. Anything fancier is honestly more trouble than it’s worth, which is fine, since I can’t afford it anyways.
Mostly I’m just tired of everyone around here seeming to think that 3D printers and CNC machines and whatnot are universally available across the modern world. They aren’t — and /not/ having them, for a project that insists on requiring them, essentially makes that project something that someone like me just can’t do. More than anything else, that’s the point I wanted to make — that not everyone has that stuff, or affordable access to it, even now, even today, and that lacking it only holds you back if you’re trying to do something that otherwise requires it.
If you want 2′ by 3′ I’d suggest you want a lathe perhaps with a supplemental milling head more than a real mill. I’d suggest that way you would get much more working area and versatility for the parts you can create in the footprint of your machine. (and mini mill seem to only exist in smaller sizes anyway)
Though if you can’t think in the right way to 3d model you may not be able to think in the right way to get the most out of a lathe (or mill to some extent) either – some odd twists thinking in 3D geometry to get those working that seem to me rather similar to the 3d modelling you struggle with. Perhaps better off sticking to the more 2D stock methods that work for you – though if you want to try it don’t take that as discouragement, I’d love everyone to get to try it if they want to. Perhaps if you can find a local machinist to give you a lesson or two before spending any money.
I would say though that 3d prints (and laser/waterjet/milled) are universally accessible and pretty cheap from the online services – so for those occasions when you really need a part that size/shape anybody can get it even without the tool to make it themselves. And many projects while they use 3d prints are in no way requiring them – but why cut, plane, sand, glue, sand some more and then apply finish to a wooden part by hand if the machine can make a lighter/stiffer/more durable one for us, with sanding and painting for a nice surface finish being very much more an optional finishing step? Sure there are reasons you might – like I happen to quite like the look of wood and metal construction over plastic, but much of the time being able to get more projects done with less effort is going to win out.
I live in the middle of nowhere and am homebound. Even the local public transportation is literally useless. There are no machinists here.
As for the online services — actually, no, they aren’t. Something like SendCutSend or Ponoko is $50-$100 at minimum, which at the larger end is more than a quarter of what I can safely spend in a month, what with the price of food these days on top of bills and rent… what’s worse, it’s essentially impossible to get such things without an additional nearly $50 of shipping, and volume ordering is arguably actually frying-pan-to-financial-fire material at that point. Prototyping via such services is utterly impossible; if I order something from one of them, it has to work the first time, and if it doesn’t, I have to /make/ it work — there’s just no room for reordering there.
Online PCB houses are actually a similar story. I still use perfboard, and I’m learning oldschool wire-wrap — milled sockets are desperately expensive, but milled pin headers aren’t nearly so bad, and can be used instead, and are low-profile enough to be viable in tight spaces. (I have a few projects for that.) Why not just custom PCB? Last I heard, OSHPark’s pretty pretty purple PCBs were at a premium I couldn’t pay, and the other services weren’t better enough to have made a difference. That said, there is one exception I made — I didn’t even /look/ at PCBWay. The Raid Shadow Legends of custom PCBs has made themselves so odious to me that I don’t care what they cost, I will not work with them at any price.
No thanks re the lathe, although I appreciate the offer — the one thing for which I would arguably use that is actually far more easily built if done “wrong”. Speaking of which — don’t think in terms of nice wood finishes. One of the reasons I long ago embraced the look of dystopian kludgework is because it’s blatantly cheap ;)
When you started with berating others projects for using 3d prints (etc) I have to disagree with you on the order in service costs – then it should just work when you order it from the service, so that one off payment for a kit of parts isn’t bank breaking. I do agree doing the printing yourself is massively cheaper in relatively short timeframe and really the only sane way to use the 3d printer as a rapid iteration prototyping device. However when replicating somebody else’s work they have already done that bit.
The reason I suggested a Lathe is if you have the ingenuity and some tooling it is hugely versatile and capable of so much more than a mill, including being in many cases just as good at the jobs you would use a mill for, or even exactly like a really tall mill turned on its side. They also come in a wider range of sizes, where I’ve never seen a mill the size you want, too big to be a mini mill, but too small for anything else. Not saying a mill isn’t better for what you do – I can’t say that not knowing what you make or how.
Also you will still need some wood finish even on a kludgework look – at least in most climates for your projects to last long enough to have been worth the effort to make. Doesn’t have to be a super high quality finish of course, just a little bit of protection, but that does add up to more work than the 3d print in a kludgework look – where you don’t even bother sanding it off the machine…
One, I wasn’t berating anyone. I was simply pointing out (as I’ve repeatedly said) that these are not universal-access machines.
That said, if you /must/ assume I was berating someone for something — even though I wasn’t, and I want to be clear about that — it would be those who assume that such machinery /is/ universal-access., specifically and exclusively for that attitude.
Funny thing, I very rarely work with wood. You’d imagine otherwise, since it’s common to prototype with when you’re “doing it right”. Almost everything I work with, however, is actually plastic. If I want something that looks like wood I have a couple castoff rolls of woodgrain contact paper from something my father did a decade or so ago.
For an example, a cyberdeck build I was doing for the recent contest, until I had to stop because I got sick. Its chassis was a long-disused keyboard shell from a vintage Compaq luggable that very much did not make it. I used pliers and wire nips to rip out sections of the internal ribbing because it wasn’t needed. A bit of drilling let me mount a Celeron 847 based NUC motherboard in the spot where the numpad used to be. I had an old (pre-chicklet-style) USB keyboard from one of those 7in tablet folio type things and I used 3M double stick foam tape to mount that to the plastic side of a Dell Wyse 3290 lid, which mounted into the Compaq keyboard shell over a random drive caddy with a 60gb SSD in it via salvaged laptop screws. An automotive grade 9-30v wide-input 5v 10a output (max, depending on input) power supply from eBay drove a Belkin 7-port USB hub in what was originally the F-key section, and was likewise tucked under the keyboard, as was an eDP driver board going to the LCD and lid from an Acer C720 Chromebook.
I still needed to do up a power supply harness and dig a longer pair of WiFi antenna leads out of the junk pile when I got sick. Power would’ve been 12v in and rather than properly calculate what I needed I probably would’ve just whacked on a 12v 10a brick from the drawer. One of the points I’d wanted to make with that build was that you don’t even need to know how to solder to do this, and the power harness would’ve used what they call “wire caps” — those crimp-style wire-nut-like things. If it can handle 120vAC 15-20a in your walls, 12vDC at a half-dozen amps or so will be practically child’s play.
Right now I’m working on an all-in-one system using the mainboard from an ECS LIVA X. The system unit is a Sprint AiRave 2.5+ that I painted black (with apologies to Mick Jagger) with paint markers after gutting completely. A PCI slot cover with a slot cut in one end via nibbler tool makes an excellent bracket for the random salvaged laptop heatsink cooling the mainboard. I did need to nab a 12v-to-5v buck-boost step down power supply and an mSATA to desktop-SATA connector adapter from the fleaBay types, but that was the only sort of thing like that, really. The LCD housing is from a “cereal bowl” G4 iMac that learned some time ago how I feel about rotten Apples (don’t feel too bad, I got it secondhand with the understanding that it had behavior problems already). I’m going to try to reuse the original display, but if not, I can scavenge something fairly easily, although everything I have (predictably) is 15in or smaller so I’ll have to fudge the bezel… I don’t mind.
This isn’t rocket science, this is junkyard engineering. Welcome to my side of the tracks… it ain’t much, but it’s mine.
Ok, you certainly seemed to me very hostile to the existence of CNC type tools and how often they come up here, so sorry if you feel I bit back a bit hard. I would say though if you want to see more stuff here that isn’t using CNC tools at all you probably have to submit some of your own stuff, projects do get published without from time to time. But as the CNC tools especially 3d printers and laser cut have become very close to universal access and are so massively more convenient of course most folks will choose to use one.
Well I mean, I actually have a 3d printer and a CNC router.. that I built using the same drill as you and a hacksaw. But I think the drill is more fun and gets more use than the CNC ones..
I think it’s a good idea, building something because you want to is different than building something because you have the tool. And limitations, even artificial ones, spark creativity and learning!
The allure of the Swiss Army Knife seems to be eternal. Why have two good tools when you can have one that does both jobs poorly? These sort of things fail precisely because they appeal to emotion rather than reality. Reminds me of the Shopsmith from the 70s. Beautiful design, great promise but the reality was well less than the fantasy. The setup time per tool was too much to make it really that useful. They still exist but never made it big as a company. I predict, at most, Shopsmith level of success for the Artisan.
What a horrible idea to combine these functions, obviously any CNC action will create havoc with the laser and 3D printer, and you mention MDF dust but metal particulates are argualbly even worse. I myself would advise a person to either pick one device and do without the others, or buy 2 or 3 seperate ones.
I don’t actually think it is that bad – being a modular tool head with changing beds means only the core motion platform is exposed to every task, and assuming that motion platform is up for the rigours of CNC Milling at all it will be exactly like every other CNC mill, lots of cleanup required after any job and checks to make sure the motion isn’t filling with swarf.
Obviously there are going to be challenges to using such a system, and it isn’t likely to be as good at any one task as an entirely dedicated machine. But it isn’t really that different in challenge to having your CNC mill in the same smallish workshop as your Laser – wood dust especially gets everywhere even if you created it only with hand powered tool, high speed cutters make more small dust bits and throw stuff rather further…
Does anybody put a laser cutter or 3D printer in a wood shop though? Does that ever happen? I know space is often hard to come by but I’d put these things somwhere else still. Maybe on a trolley in seperate space or something if I was really desperate, to be rolled out to such a wood shop when I needed to use them.
Still, if it works for you more power to you, I don’t mind.
My entire workshop space is around 3 meter square with low ceiling, and the garden when UK weather permits. There isn’t more space to be had. And I know lots of folks with their shop being their garage, so maybe a touch bigger to around twice the size if its a double than mine but still not huge.
So for many the space has to be very multi-purpose – as most of us do work in more than one material and process and some of these tools are far to useful to ignore if you can find a way to make them fit.
You need to build a shed in the garden like Julian Ilett.
“You need to build a *Bunker/Tunnel under* the garden like Colin Furze.” FTFY =]
@Shod It is a shed, a pretty well built insulated shed with a reasonable sized breaker of its very own so power isn’t an issue but still definitely more shed than real building.
@Zar That would be be nice, and that hydraulic digger of his seems quite meditative to use. Might need to steal the ground under the neighbours places too though.
This so-called jack of all trades was in fact William Shakespeare. The full phrase is “a jack of all trades is a master of none, but oftentimes better than a master of one.” It was a compliment.
“Snapmaker was kind enough to send me an Artisan that I have by now spent a fair bit of time with” Must be nice. . HaD is doing sponsored content and reviews now? Thanks for being at least a little honest about it up front.
You have to SHUT DOWN the machine to swap tools and beds? That doesn’t seem convenient at all.
Please be kind and respectful to help make the comments section excellent. (Comment Policy)
This site uses Akismet to reduce spam. Learn how your comment data is processed.
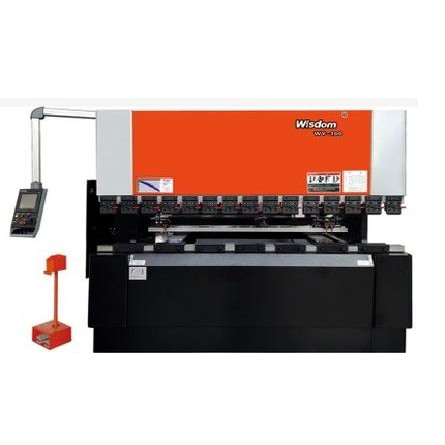
China Cnc Punching By using our website and services, you expressly agree to the placement of our performance, functionality and advertising cookies. Learn more